Saturday, 10 January 2015

what is photography

Photography is the science, art and practice of creating durable images by recording light or other electromagnetic radiation, either electronically by means of an image sensor, or chemically by means of a light-sensitive material such as photographic film.

The photographic camera was the result of combining many technical discoveries, which probably started with the camera obscura, a box with a hole in it which allows light to go through and create image onto the piece of paper.


 A still camera is an optical device which creates a single image of an object or scene, and records it on an electronic sensor or photographic film. All cameras use the same basic design: light enters an enclosed box through a converging lens and an image is recorded on a light-sensitive medium. A shutter mechanism controls the length of time that light can enter the camera. Most photographic cameras have functions that allow a person to view the scene to be recorded, allow for a desired part of the scene to be in focus, and to control the exposure so that it is not too bright or too dim. A data display, often a liquid crystal display (LCD), permits the user to view settings such as ISO speed, exposure, and shutter speed.


This is the kind of camera I'll use to experiment with photography, a semi reflex, which being a good quality camera, with a decent lense, is also a little bit easier to use than a reflex one, because gives you a little less freedom using it. (doesn't have a manual focus, and you can just take pictures looking at the screen, for example) 

Friday, 9 January 2015

kinds of photography

Since a photographic camera is today a accesible object to everyone or nearly everyone, the ways and possibilities of use has been multiplied: since science to arts, to remember a moment, person or place, because work or pleasure... Take pictures became something usual and now photography is everywhere!!

Probably the best way to differentiate between kinds of photography is by their intention.

Scientific photography, for example, is used to research and study. The emphasis of this photography is on accuracy, making sure the work can be useful to scientists and researchers.


It is also very used with the same as intention macro photography. But it is also used to show what details aren't very ovbious to the human eye, like the example above, you can see the minute details on the spider's face.


Another medium is Street photography, which is used to capture the face of the society and the living elements using natural or available lights ( street lights, cars, shop lights, sun light... f.ex)


Night photography usually has the intention to capture lights, streets lights, cars, shops and nightlife...
Examples of this are found in club photography
and also artistic photography.


Fashion is a industry which uses photography
to promote the work of fashion designers and it's industry.  Usually the photos are composed of staged portraits, using studio lights with a focus on glamour and the intention to sell the work of the designers.


Wildlife photography is used to catch images of wild animals in their natural habitat.
Usually they can't use artificial illumination and flashes as it would shock the animals (specially if they are wild). Wildlife photographers instead use long lenses to be safe and able to capture natural moments of very different ( and sometimes dangerous)  animals.


Sport photography is used to document and also promote sport events .

 These photographers usually use fast speed shots to capture the movement and action inside the match or sport event. Again they make use of powerful lenses to bring the viewer closer to the action.


Portrait photography is used to capture the personality of the subject.
Sometime they are taken inside of a natural setting, in a studio with artificial illumination, or which is very popular in social media, a "selfie", which is a  self-portrait taken usually by amateurs with phone cameras or small digital cameras.


Portrait photographs are sometimes used by actors, models, musicians... to promote themselves.


B/W photography is used to capture the quality of textures, lights and shadows in whatever subject is being photographed.

 It can be used in many ways, but maybe the most popular use of b/w is in portraits. But there are examples of b/w photography which are landscapes, wildlife, street photography, etc.


Thursday, 8 January 2015

Macro

Taking this kind of picture was kind of easy. I just adjusted the exposure time and ISO number depending of the ambient light at the moment of the shot and then I've chosen the mode macro on my camera, which helps focusing in a very short distance. But this automatic way to take the shot sometime makes it difficult in the way that focus automatically and sometimes make it harder to take the shot that you want, not the one the machine wants to.


Wednesday, 7 January 2015

street photography


To take this pictures I went out to the street a couple of different days,  because depending of the ambient light I had to set differently the camera. Anyway I did chose sunny days to go out to take pictures so  all the pictures have brilliant colours (because with sun light all colours look shinier) and a low exposure time and ISO number, as in a bright day you don't need  a high ISO which gonna make brighter the image or a long exposure time, because if you do that on a bright day you will take too much light and burn the image.

1.exp 1/100 +-0.0 ISO80
2. exp1/200 +-0.0 ISO80
3.exp 1/800 +-0.0 ISO80
4.exp 1/200 +-0.0 ISO80


Tuesday, 6 January 2015

art photography


I decided to make an art photography post to feel
free to take the pictures I liked, looking for

1
visual effects and nice colours.

The pictures 1 & 2 have been taken indoors, and were actually difficult to take, because the colour of the bulb's light used. I had to take the shots using tungsten mode, which bring up the blues and I used to correct the red.
on the top picture (wrong one we can see how I used a normal mode and lower exposure and ISO number and looks much more red and way too dark. ( Anyway the other pictures still looking very red)

exposure +2.0
ISO 800
tungsten mode


2


wrong bridge shot:exp 1/4 sec ISO400
3
4


 The shot 3 &  4 have been taken at night at the street, I wanted to make a very dark image with just the bridge illuminated by the lights of the background. The first one, 3,  was taken with the exposure time on +1.7, ISO 400.  It is too dark, but because I wanted it very dark anyway I remake it (4) just changing the ISo to 800.

5
I went out one grey morning to the skatepark and took some shots. I didn't need to use a very high ISO and a short exposure time. was actually easy to get the images more or less right, because the natural illumination, I think.
6
7
8

pic 5: exposure-1.0   ISO200

6:exp -0.7 ISO 100
 
8: exp -+0.0 ISO 200

9: exp +0.3 ISO 100


9


example of a wrong picture (too dark)
exp 1/800 ISO 200


Monday, 5 January 2015

Night photography.

 As we already know, night photography is focused on the recreation of lights in contrast with the darkness of the night.
I went to the street to take some pictures as a example and experiment with it:


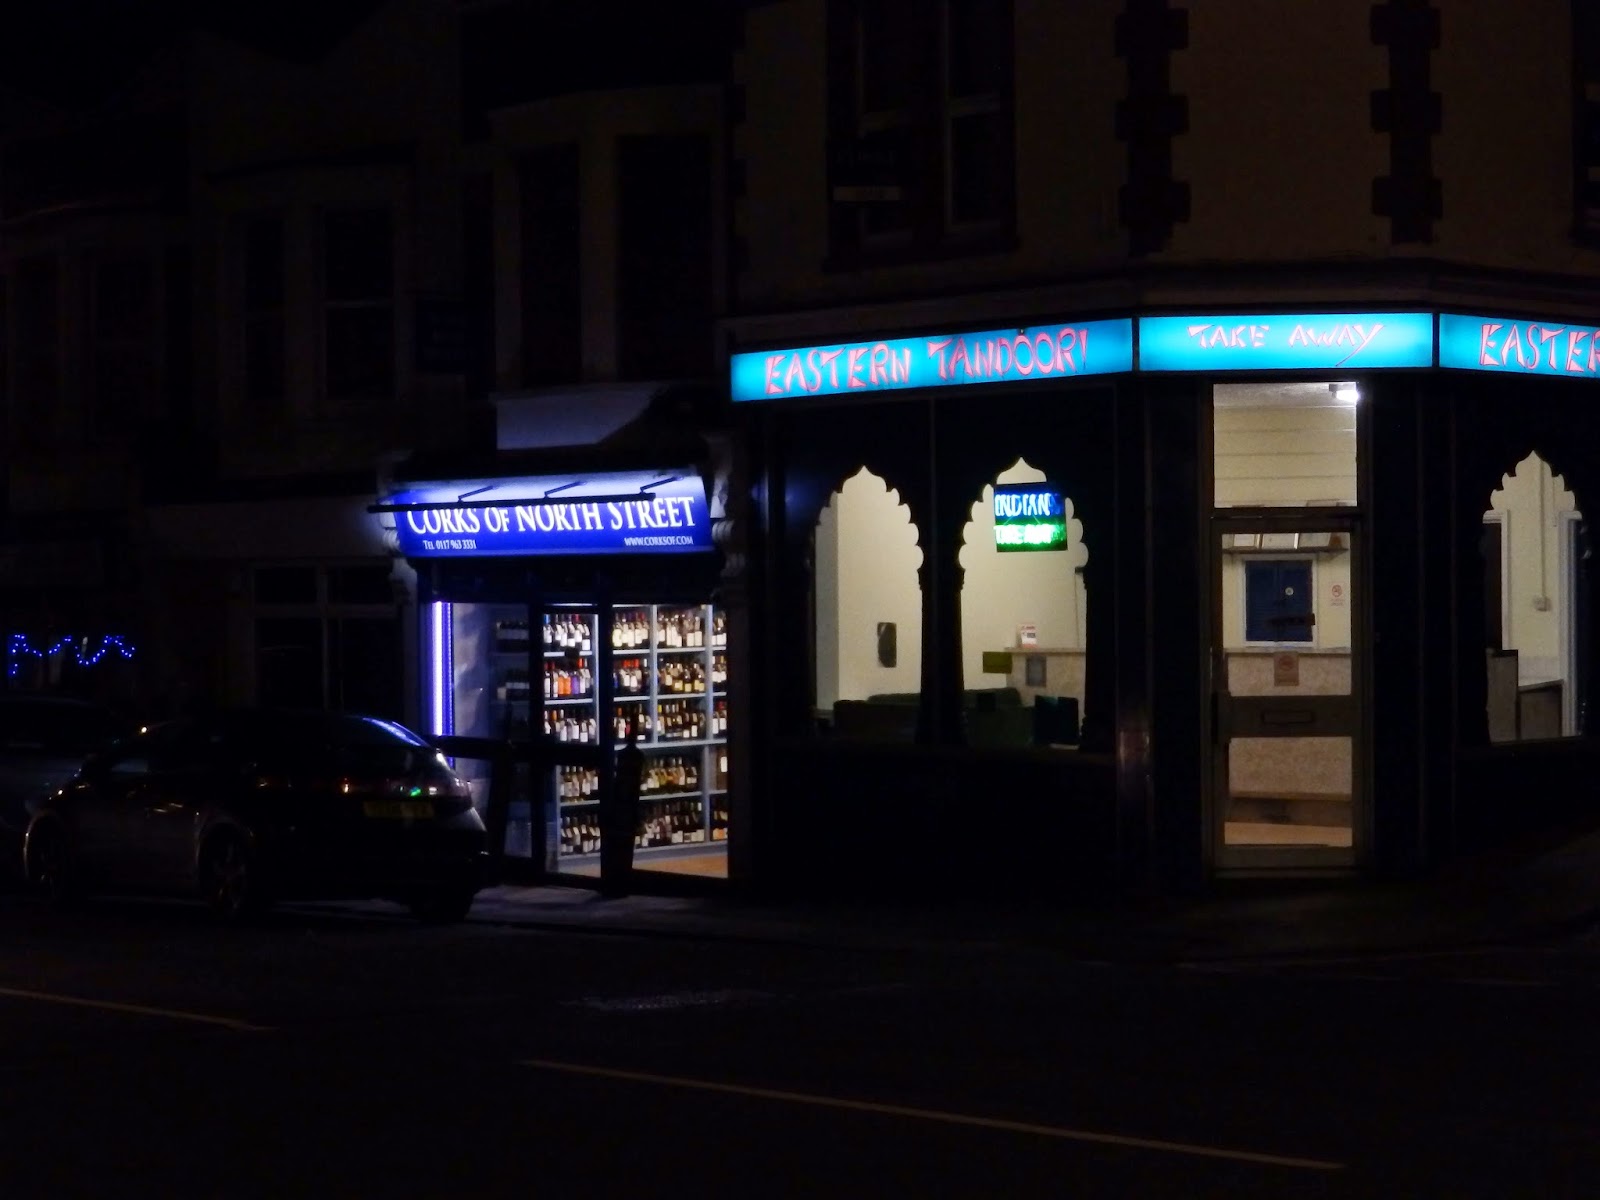
This first example of night photography I took a shot of a shop, trying to catch focused and defined the lights on it's door.
As we can see on the first one, I had the exposure open too long (exposure 0.0, ISO800,) what made the camera absorb too much light, making visible the street, illuminated a street light, but burning the blue lights of the shop, which were my first objective.

As this image wasn't successful I took the picture again giving some zoom to it, and also changing the settings of the camera:  I used a lower Iso number and  I dropped the exposure time as well(1/50 F4.4 exposure-2.0, ISO400, WB AUTO) taking a darker shot, but with all the illuminated areas clear, defined and with a nice bright color.


Then I started to play with the lights, the first picture I took I zoomed into some lights and blurred them. I used a short exposition time (-1.3), to keep the shape and the intense colours of the circles, and a high Iso number(800), to keep the shot bright.


Then I did just the oposite:I opened the exposition to +1.0 and dropped the ISO number to 200 to keep the image dark. Because the shot was long I could move a little my camera and move the lights, if you get good on it you can draw with the light just making the shot whit a very long exposure time, in a dark enough place.


This two pictures were taken in the night with the illumination of  light bulbs. To keep the impression of the night I used a low ISO number (200) and I left the exposition on 0.0 . Because it was enough illumination I could take a  not long shot and the person walking is mostly well defined, and the red colour appears dark and intense.